We understand that a multi-lingual website reaches a vast audience and enhances search engine rankings. With more and more entry websites, it is necessary to stay competitive. So, a website available in more than one language is always beneficial.
Therefore, translate your WordPress website using the “Loco Translate” plugin. The simple interface and reliable features in the Loco Translate plugin allow you to create your website in multiple languages.
Table of Content
A) What is Loco Translate?
Loco translate is the WordPress plugin that translates WordPress themes, plugins, and site language, with over 1 million active installations. This plugin allows you to translate them directly from the WordPress dashboard. It has both automatic and manual translation features. With the user-friendly interface, you can manage the translation and choose the method that suits you the best.
B) How to Translate Automatically
You can automatically translate your WordPress website. It is an easier and faster way to produce an outcome. Use the “Loco Translate” plugin with the “Automatic Translate Addon For Loco Translate” plugin.
B-1) Install and Activate the Loco Translate and Automatic Translate Addon For Loco Translate plugins.
- If you have not installed the plugins, go to Plugins>Add New and type in the names of the plugins. Then, install and activate them.

Once you are done with it, the next step is to translate the theme and plugins of your choice.
B-2) Translate Theme
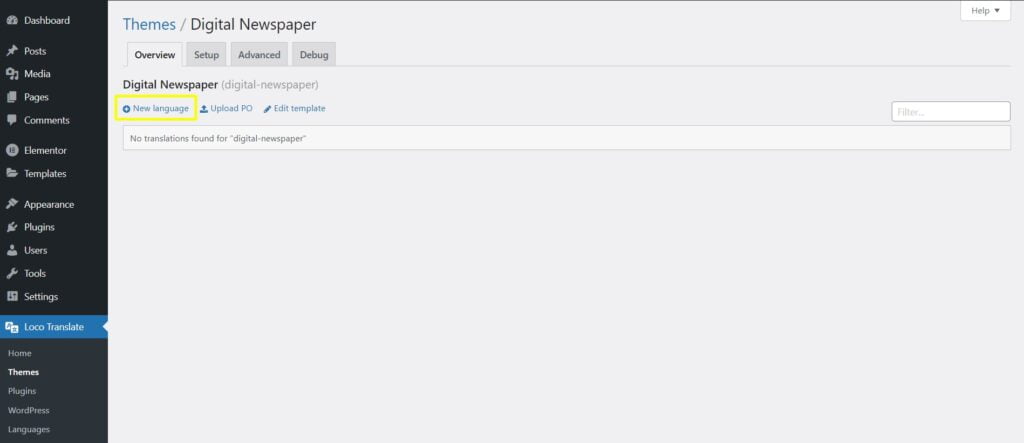
- Go to the “Loco Translate” area in the WordPress dashboard and click “Themes,” choose the theme you want to translate.

- Click on “New Language”
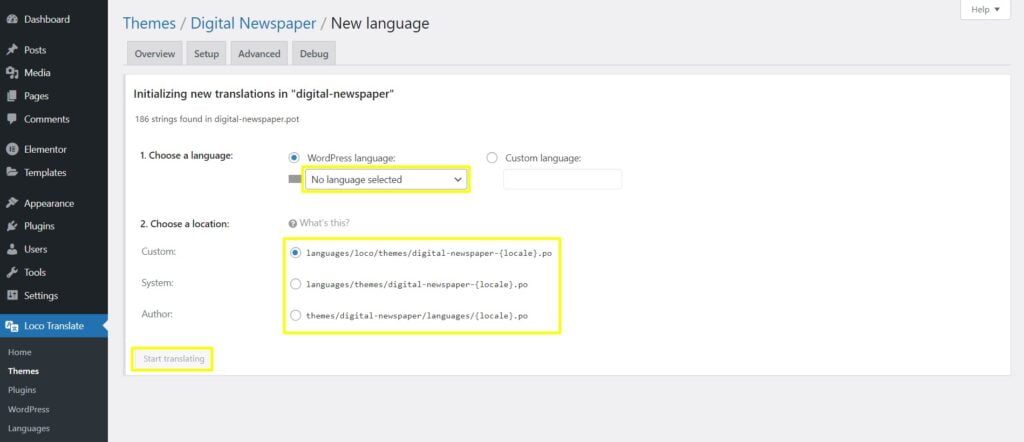
- Select a language that you want to change your theme into.
- Select a location.
There are three different locations available:
- Custom: This creates a new language file in a custom directory. If you want to maintain control over your translation, choose Custom. It separates the translation from the default WordPress files. Therefore, you can update the translations independently of WordPress updates.
- System: This saves the translation file in the default WordPress directory. If you want to keep your translation in sync with WordPress updates, choose System. It does not maintain separate translation files.
- Author: This will save the translation files in the theme’s directory. If you want to contribute your translation to the theme author, choose Author. It will allow them to include your translation in future updates.
- Click the “Start Translating” button.
- Click the “Auto Translate” button.

- Tap on “Translate” and “Merge Translation.”

- Select “Overwrite existing translations” to replace the existing translations file with a new translation file in the editor. Or,
Select “Mark new translations as Fuzzy” to review the new translation file before saving.
(Note: Automatic translation may not be accurate every time.)
- Select “Start Adding Process.”

- At last, press “Save.”
You can download the PO(portable object) and MO(machine object) file extensions to store and retrieve translations of text strings. The opinions are in the top-right corner of the editor screen.

B-3) Translate Plugin
Translating the plugin is quite similar to converting the theme.
- Go to “Loco Translate” from your WordPress dashboard and click “Plugins.”
- Select the plugin that you want to translate.
- Click on the “New Language” option to choose a language and a location. Then, press the “Start Translating” button.
It takes you to the editor screen.
- Click the “Auto Translate” button and select “Yandex Translate.”
- Press “Translate” and “Merge Translation.”
- Lastly, put the check mark on either of the boxes and click the “Start Adding Process.” Make sure to save the changes you made.
B-4) Set New Site Language
Navigate to WordPress Dashboard>Settings>General. Then, set the new language from the drop-down menu in the Site Language category.

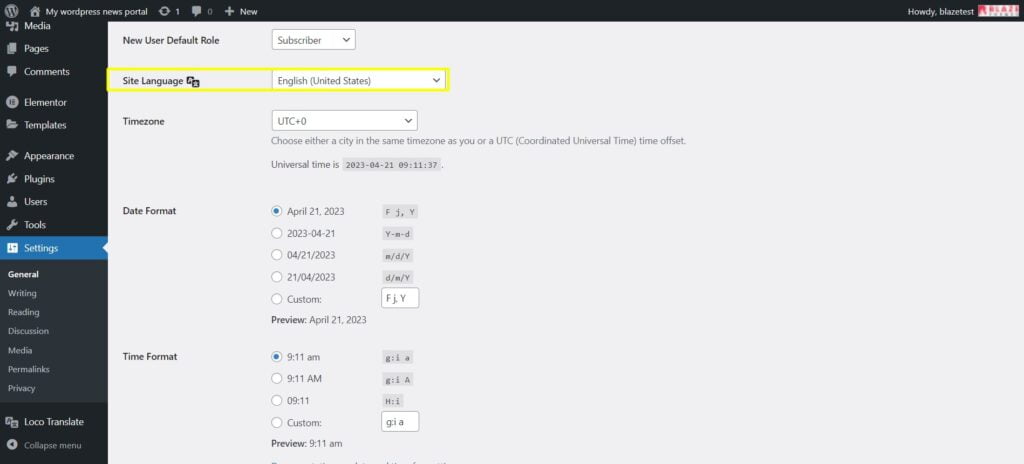
And at the end of the page, click “Save Changes.”
C) How to Translate Manually
Translating the WordPress website manually is a reliable approach and is straightforward.
C-1) Install and activate the “Loco Translate” plugin.
- From the WordPress dashboard, go to Plugins>Add new. Then, type in “Loco Translate” in search plugins. Install and Activate the plugin.
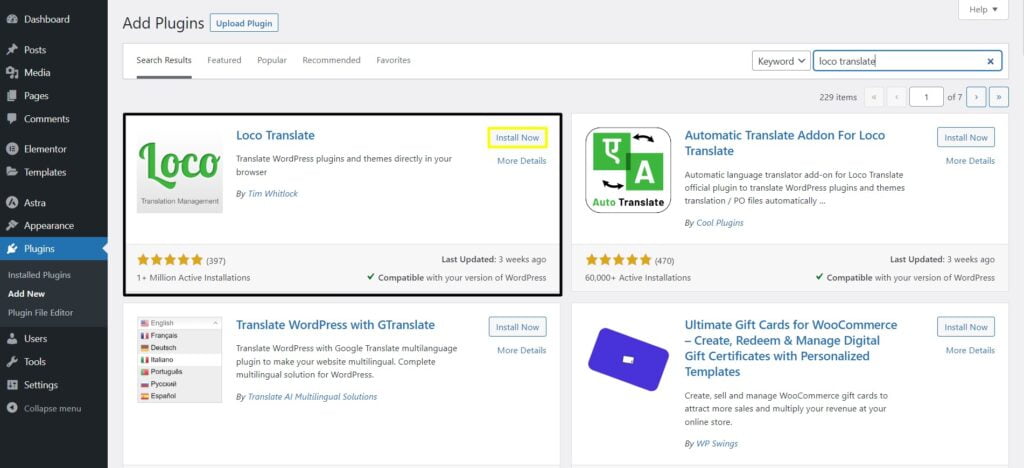
C-2) Translate Theme
- Go to “Loco Translate” from your WordPress dashboard and click “Themes.”
- Select the theme that you want to translate.
- Click on the “New Language” option to choose a language and select a location. Then, press the “Start Translating” button.
It takes you to the editor screen. You can type a string you want to translate inside the filter translations box.
- Select the string from the source text box. Then, manually convert the text into the chosen language in the translation box.
- After the necessary changes, press “save.”

C-3) Translate Plugin
- Go to “Loco Translate” from your WordPress dashboard and click “Plugins.”
- Select the plugin that you want to translate.
- Click on the “New Language” option to choose a language and select a location. Then, press the “Start Translating” button.
It takes you to the editor screen. You can type a string you want to translate inside the filter translations box.
- Select the string from the source text box. Then, manually convert the text into the chosen language in the translation box.
- After the necessary changes, press “save.”
D) Conclusion
Loco Translate translates the WordPress plugins and themes directly into your browser. It is a straightforward procedure. You can convert WordPress websites into various languages without external tools or software. Similarly, manage and edit the translation files: PO and MO. Moreover, it is a powerful tool for users to make their website accessible to non-English speakers.
Therefore, use the Loco Translate plugin for your WordPress website and increase the visibility of your website. At last, Your valuable insights and experience are always welcome. Please do not hesitate to share them with us.

